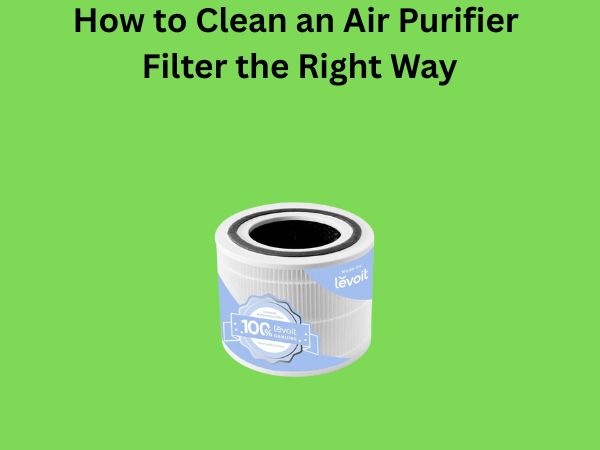
How to Clean an Air Purifier Filter the Right Way: A Complete Guide
Think of your air purifier filter like the lungs of your home. Just as our lungs need to stay clean to help us breathe properly, your air purifier filter needs regular care to do its job effectively. I’ve noticed that many people buy an air purifier, set it up, and then forget about it for months. This is a common mistake that can significantly reduce the device’s performance and lifespan.
When you invest in an air purifier, you’re making a commitment to cleaner, healthier air for you and your family. But here’s the thing—that investment only pays off if you maintain it properly. A dirty, clogged filter is like trying to breathe through a cloth; it simply won’t work as intended. In this comprehensive guide, I’m going to walk you through everything you need to know about cleaning your air purifier filter the right way.
Understanding Your Air Purifier Filter Types
What Are the Different Types of Filters?
Not all air purifier filters are created equal, and that’s important to understand before you start cleaning. There are several types of filters commonly found in air purifiers, and each one requires slightly different care.
- HEPA Filters: These high-efficiency particulate air filters capture 99.97% of particles as small as 0.3 microns. They’re the gold standard in air purification.
- Activated Carbon Filters: These work by absorbing odors and gases, making them excellent for removing cooking smells and smoke.
- Pre-filters: These coarser filters catch larger particles like dust and pet hair before they reach the HEPA filter.
- Ionizers: Some purifiers use ionization technology alongside filters to charge and neutralize particles.
- UV Filters: These use ultraviolet light to kill bacteria and viruses.
Identifying Your Filter Type
Before you start cleaning, you need to know exactly what type of filter you’re working with. Check your air purifier’s manual or look at the filter itself. The filter typically has a label or color coding that indicates its type. This is crucial because some filters can handle more aggressive cleaning than others, while some should never be washed at all.
Why Regular Cleaning Matters More Than You Think
The Performance Impact
A clogged filter is like a highway traffic jam—everything moves slower and less efficiently. When your air purifier filter accumulates dust and particles, it has to work harder to push air through, which reduces its effectiveness and increases energy consumption. You might notice that your air quality hasn’t improved, or that your purifier seems louder than usual. These are telltale signs that your filter needs attention.
Studies show that a dirty filter can reduce an air purifier’s effectiveness by up to 70%. That’s a significant drop in performance that could be affecting your health and well-being without you even realizing it.
Health and Longevity Benefits
Regular cleaning extends your filter’s lifespan, which saves you money in the long run. More importantly, it ensures that your air purifier is actually doing what it’s supposed to do—keeping your air clean and healthy. If you have allergies, asthma, or respiratory issues, a well-maintained filter can make the difference between good days and bad days.
When to Clean Your Filter vs. When to Replace It
Reading the Signs
Not every dirty filter needs replacement; sometimes cleaning is all it needs. Here’s how to tell the difference:
If your filter is still relatively new but looks dusty or has a layer of particles on it, cleaning is usually the answer. However, if your filter is near the end of its expected lifespan (typically 6-12 months depending on the type), it’s probably time for replacement even if it could technically be cleaned.
Visual Inspection Guidelines
- Light gray or tan discoloration—usually just needs cleaning
- Dark brown or black staining—may indicate carbon saturation and need replacement
- Visible tears or damage—must be replaced immediately
- Collapsed or deformed structure—replacement necessary
- Musty or unpleasant odor that won’t go away after cleaning—time for a new one
Tools and Materials You’ll Need to Get Started
Essential Cleaning Supplies
Gathering the right tools before you start makes the entire process smoother and more effective. You don’t need fancy equipment—most of these items you probably already have at home.
- A soft brush or old toothbrush: Perfect for gently dislodging trapped particles
- Vacuum cleaner with hose attachment: Useful for removing loose dust
- Compressed air canister: Excellent for blowing out particles from hard-to-reach areas
- Clean, lint-free cloth: For gentle wiping and drying
- Distilled water: Better than tap water for certain filters to avoid mineral buildup
- Mild dish soap: Only for pre-filters that can handle gentle washing
- Large sink or basin: For soaking filters if needed
- Flat, clean surface: For air-drying your filters
Step-by-Step Cleaning Process for Your Air Purifier Filter
Step 1: Turn Off and Unplug Your Air Purifier
This is non-negotiable for safety reasons. Never attempt to clean your filter while the device is running or plugged in. Give yourself a few minutes for the purifier to completely stop and cool down. This also allows any loose particles to settle, making your cleaning more effective.
Step 2: Remove the Filter Carefully
Open your air purifier according to the manufacturer’s instructions. Handle the filter gently—you don’t want to damage it or shake loose particles into the air. Some filters are fragile, so avoid squeezing or bending them unnecessarily. Place the removed filter on a clean surface or newspaper to catch any falling dust.
Step 3: Initial Dust Removal
Start by removing the loosest, most obvious dust. You have two main options here:
The vacuum method works well for many filters. Using the hose attachment on low setting, gently pass it over both sides of the filter. Keep the vacuum a few inches away to avoid direct contact, which could damage the filter material.
The compressed air method is gentler and often more effective. Hold the canister upright and use short bursts of air to blow dust out from the filter. Work from the clean side toward the dirty side, which helps push particles out rather than deeper into the material.
Step 4: Gentle Brushing
Take your soft brush or old toothbrush and gently brush the filter’s surface. Use light, sweeping motions—imagine you’re brushing cobwebs off a wall, not scrubbing dirt off concrete. Pay special attention to the pleats and crevices where particles like to hide. The goal is to dislodge particles, not to damage the filter material.
Step 5: Washing (If Appropriate)
Only certain filter types can be washed with water. Pre-filters and some mesh filters can handle this, but HEPA filters and activated carbon filters typically cannot. Always check your manual first.
If your filter can be washed, fill a basin with lukewarm distilled water and add just a drop or two of mild dish soap. Soak the filter for 10-15 minutes, then gently swish it around. Never scrub aggressively or wring out the filter. After soaking, rinse thoroughly with clean distilled water until all soap residue is gone.
Cleaning Different Filter Types: A Detailed Guide
Cleaning HEPA Filters
HEPA filters are the most delicate and require the most careful handling. Never wash a HEPA filter with water—this can damage the fine filter material and actually reduce its effectiveness. Instead, use only the vacuum or compressed air method. Be extra gentle, and if your HEPA filter is still not performing well after cleaning, it’s probably time to replace it rather than risk damaging it further.
Cleaning Activated Carbon Filters
Like HEPA filters, activated carbon filters shouldn’t be washed with water. Water can deactivate the carbon and reduce its odor-absorbing abilities. Stick with vacuum or compressed air cleaning only. If your activated carbon filter has stopped eliminating odors despite cleaning, replacement is your best option.
Cleaning Pre-filters
Pre-filters are the toughest and most forgiving. They can handle more aggressive cleaning, including gentle washing with soap and water. You can even use a soft brush more vigorously on these without worrying about damage. Their job is to catch large particles, so they’re built to be sturdy.
Cleaning Mesh Filters
Mesh or washable filters can be cleaned with water and mild soap. Submerge them completely and let them soak for 15-20 minutes. Gently brush or rinse away trapped particles. These filters are designed for repeated cleaning, so you can be a bit more thorough than with HEPA filters.
Drying and Reinstallation: Getting It Right
The Drying Process
This might seem obvious, but it’s critically important: never reinstall a wet or damp filter. Moisture can damage your air purifier’s motor and create an environment for mold and bacteria growth. After cleaning, place your filter on a flat surface in a well-ventilated area. Avoid direct sunlight, which can degrade some filter materials, and avoid humid areas like bathrooms.
Depending on the filter size and type, air drying typically takes 24-48 hours. Yes, this is longer than you might want to wait, but it’s worth it. Don’t use a hair dryer or heat source to speed up drying—this can damage the filter. Patience pays off with a properly maintained filter.
Checking for Complete Dryness
Before reinstalling, do a touch test. The filter should feel completely dry, not just surface-dry. If you’re uncertain, wait another 12 hours. A damp filter will impact your air purifier’s performance and could potentially cause electrical issues.
Reinstalling Your Filter
Once your filter is completely dry, carefully slide it back into your air purifier, ensuring it’s properly seated. Some filters only fit one way, so pay attention to directional indicators. Close the access panel, plug in your device, and you’re done. It’s that simple once you’ve done it a few times.
Common Mistakes People Make When Cleaning Air Purifier Filters
Mistake 1: Cleaning the Wrong Filter Types
I can’t stress this enough—you shouldn’t wash every filter. Many people damage their HEPA or carbon filters by attempting to wash them. Always consult your manual first. When in doubt, use only dry cleaning methods like vacuuming or compressed air.
Mistake 2: Reinstalling Damp Filters
The urge to get your air purifier running again is understandable, but installing a damp filter is a recipe for problems. It reduces efficiency and risks damaging the device. Make a schedule so cleaning doesn’t interfere with your purifier’s operation.
Mistake 3: Using Excessive Force
Filters are delicate instruments designed for durability, not abuse. Aggressive scrubbing, wringing, or bending can tear the material and create gaps where unfiltered air can pass through. Treat your filter gently, and it will serve you well for months.
Mistake 4: Forgetting to Clean Pre-filters
Pre-filters do the heavy lifting by catching large particles first. If you neglect to clean these, they become clogged quickly, forcing the HEPA filter to work harder and reducing overall system efficiency. Clean your pre-filter regularly—often more frequently than the main filter.
Mistake 5: Using Tap Water
If you’re washing filters, use distilled water when possible. Tap water contains minerals that can leave residue on the filter and reduce effectiveness. It’s a small detail that makes a real difference in performance.
Creating and Following a Maintenance Schedule
Recommended Cleaning Frequencies
The right cleaning schedule depends on several factors: your environment, how often you use the purifier, and whether you have pets or allergies. Here’s a general guideline I recommend:
- Pre-filters: Every 1-2 weeks (they get dirty fastest)
- HEPA filters: Every 1-3 months (gentle dry cleaning only)
- Activated carbon filters: Every 2-3 months (dry cleaning only)
- Mesh filters: Every 2-4 weeks (can handle more frequent cleaning)
Adjusting Your Schedule
If you have pets, smoke in your home, live in a dusty area, or have air quality concerns, increase your cleaning frequency. Conversely, if you live in a clean environment and rarely use your purifier, you might extend the timeline. Pay attention to your specific situation and adjust accordingly.
Extending Your Filter’s Lifespan: Pro Tips
Reduce Dust Entry
The less dust your air purifier has to deal with, the longer your filters last. Reduce the dust entering your home by vacuuming regularly, using doormats, keeping windows closed on high-pollen days, and minimizing activities that create particles (like smoking indoors).
Position Your Purifier Strategically
Where you place your air purifier matters. Keep it away from walls and furniture that might block airflow. Position it in a central location where it can reach the most air. This ensures efficient operation and reduces strain on the filter.
Keep Your Filter Area Clean
Dust doesn’t just appear on filters—it comes from somewhere